When it comes to automotive body repair, having the right welding tools is crucial for achieving a quality finish and ensuring the structural integrity of a vehicle. Welding is not just about joining metal parts; it also requires precision, skill, and appropriate equipment. In this article, we will discuss the essential tools needed for effective welding in automotive applications.
Understanding the different types of welding processes, such as MIG, TIG, and stick welding, is fundamental for anyone looking to perform body repairs. Each method has its unique set of tools and applications, making it imperative for technicians to be well-versed in their use. From welding machines to safety gear, every aspect plays a vital role in successful repairs.
Moreover, utilizing the right tools enhances efficiency and can ultimately save time and costs in the repair process. In the following sections, we will delve into the specific tools required for automotive welding, including their functions and recommendations for best practices. Whether you’re a seasoned professional or a DIY enthusiast, equipping yourself with the proper tools will ensure your welding projects are both safe and effective.
Choosing the Right MIG Welder for Automotive Applications

When it comes to automotive body repair and restoration, selecting the appropriate MIG welder is essential for achieving high-quality results. The right welder not only enhances performance but also ensures that your work meets the structural and aesthetic standards required in the automotive industry.
First, consider the material thickness you will be working with. Most automotive applications involve thin metals, typically ranging from 18 to 14 gauge. A MIG welder with an output range of 30 to 250 amps is ideal, as it provides the versatility needed to handle various thicknesses without causing burn-through or distortion.
Next, evaluate the gas type used in your welding process. A common choice for automotive repairs is a mix of 75% argon and 25% CO2, as it offers a good balance of penetration and bead appearance. Ensure the MIG welder is compatible with this gas mix, or explore options that support various gas configurations.
The wire feed speed is another crucial factor. The ability to adjust the wire feed speed allows for better control over the weld puddle, resulting in cleaner seams and less spatter. Look for welders that provide a smooth and continuous feed to maintain a consistent welding arc.
Portability can also play a significant role in your choice, especially if you plan to work on different vehicles or locations. Choose a MIG welder with a compact design and lightweight construction that can easily be transported to job sites.
Lastly, consider the price and brand reputation. Investing in a reliable MIG welder from a well-known brand can provide you with better customer support and access to replacement parts, ensuring your welding equipment remains operational during restoration projects.
In summary, selecting the right MIG welder for automotive applications involves understanding your specific needs regarding material thickness, gas type, wire feed speed, portability, and budget. Taking these factors into account will lead to successful and efficient automotive body repair and restoration.
Essential Safety Equipment for Welding Projects in Auto Restoration
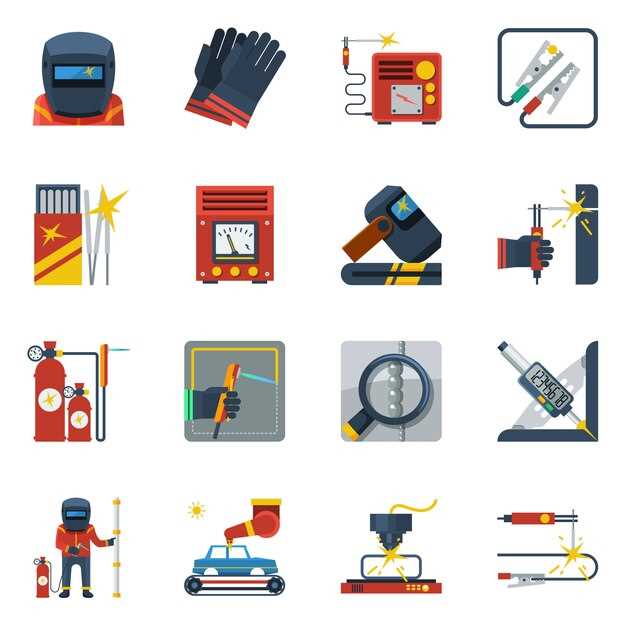
When undertaking welding projects in auto restoration, safety should always be the top priority. Proper safety equipment helps minimize risks and ensures a safer environment. One of the most critical pieces of equipment is a welding helmet, which protects the eyes and face from the intense light and heat generated during welding. Look for helmets that offer an auto-darkening feature for convenience and enhanced protection.
Additionally, flame-resistant clothing is essential. This includes jackets, gloves, and pants made from materials that can withstand sparks and heat. Wearing long sleeves and pants shields the skin from potential burns. It is advisable to use leather gloves specifically designed for welding, as they provide better dexterity and protection than regular gloves.
Protective eyewear is another crucial component, particularly for those involved in the welding process. Safety goggles or glasses should be worn under the welding helmet to provide additional protection against flying debris and UV rays that may penetrate the helmet.
Respirators and masks may also be necessary, especially in enclosed spaces. Welding can produce harmful fumes and gases that pose serious health risks. A respirator designed for welding applications will filter out these hazardous particles, ensuring clean air when working.
Finally, having a first-aid kit nearby is vital. Accidents can happen even with the best precautions, and having the right supplies on hand allows for immediate attention to minor injuries. Regularly checking and updating the first-aid kit ensures preparedness in case of emergencies.
Tips for Using Oxy-Acetylene Torch in Body Panel Repair

The oxy-acetylene torch is an essential tool in automotive body restoration, allowing for precise cutting, welding, and brazing of metal panels. To achieve optimal results, follow these tips to ensure effective usage while minimizing risks.
Firstly, always ensure that you have the right safety equipment. This includes goggles with proper shading, gloves, and flame-resistant clothing. Protecting yourself is paramount in a workspace where high temperatures and metal fragments are present.
Before starting any work, inspect your torch and hoses for leaks or damage. Connect the equipment to a reliable gas source and perform a leak test using soapy water on the connections. This precaution prevents dangerous gas leaks and ensures the tool operates efficiently.
When heating metal panels, control the flame’s size and shape effectively. A neutral flame, characterized by equal amounts of oxygen and acetylene, is ideal for welding thin gauge sheet metal. Adjust the flame until the inner cone is sharp and well-defined to achieve clean and effective welds.
Practice proper torch technique to avoid warping or burning the metal. Hold the torch at a 45-degree angle and maintain a consistent distance from the workpiece. Move smoothly across the panel to ensure even heat distribution and avoid hotspots that can lead to distortion.
For body panel repair, it’s crucial to clean the surfaces beforehand. Remove any rust, paint, or contaminants that can interfere with the welding process. A clean surface promotes better fusion and enhances the longevity of the repair.
During the welding process, consider the use of filler materials when needed. Choose the appropriate filler rod based on the metal type and thickness of the panel. This ensures a strong bond and adds strength to the repair area, making it suitable for restoration.
After welding, allow the metal to cool naturally. Quenching with water can create stresses in the metal, leading to cracks or warps. Instead, remove the torch once the desired weld is achieved and let the panel cool down at room temperature.
Lastly, practice makes perfect. If you’re inexperienced with the oxy-acetylene torch, spend time honing your skills on scrap pieces before tackling the actual vehicle panels. Gaining confidence and technique will make a significant difference in your restoration projects.
